






Mica Washers: Safe, Efficient Heat Sink Installation Guide
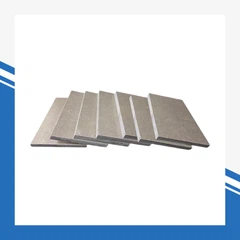
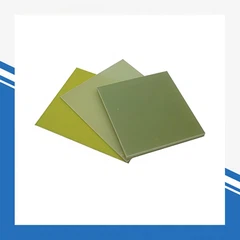
When installing heat sinks using mica washers, you prevent electrical short circuits while directing heat away from sensitive components. Made from silicate minerals, mica washers remain stable at high temperatures and are chemically inert with other materials. Featuring high mechanical strength and excellent vibration resistance, they effectively safeguard the safety of your electronic devices.
Key Summary
Mica washers prevent electrical short circuits and improve thermal conductivity, making them essential for the safe installation of heat sinks.
Always clean surfaces before installation to ensure better adhesion and maximize the effectiveness of thermal paste.
Use thermal paste sparingly. A thin layer is sufficient to fill gaps without compromising thermal efficiency.

Mica Washers: Tools & Materials
Required Items
To install a heat sink with mica washers, you will need the following components for a smooth process:
Mica washers
Heat sink
Mounting hardware (screws, nuts, metal washers)
Plastic insulating washers
Thermal paste
Cleaning supplies (isopropyl alcohol, lint-free cloth)
Electric screwdriver with torque control
Importance of Each Component
Every item serves a unique purpose during installation:
Mica washers provide electrical insulation while efficiently transferring heat away from sensitive parts. Thanks to outstanding thermal management properties, muscovite mica offers a thermal conductivity of approximately 4.05 W/(m·K), making mica washers more effective than many other insulating materials.
Heat sinks cool electronic components by dissipating heat.
Mounting hardware securely holds all components in place.
Plastic insulating washers prevent electrical shorting caused by direct contact between metal parts.
Thermal paste fills microscopic gaps between surfaces to enhance thermal conduction.
Cleaning supplies remove dust and grease to optimize thermal paste performance.
Torque-controlled electric screwdriver prevents damage to washers or components during tightening.
Note: Mica washers are cost-effective and highly durable. They last longer than many alternatives with a lower environmental footprint, which is why industries such as aerospace and automotive rely on mica for its reliability in high-temperature environments.
| Aspect | Mica | Alternatives |
|---|---|---|
| Performance | Excellent | Generally inferior |
| Cost | Cost-effective | Higher initial cost |
| Durability | Long-lasting | Poor durability |
Mica washers enable safe, reliable, and high-efficiency heat sink installation.

Mica Washer Installation Steps
1. Surface Preparation
For optimal heat sink installation, start with thoroughly cleaned surfaces:
Remove any transistors or components attached to the housing or heat sink.
Dispose of any old mica insulators.
Clean the heat sink and component surfaces with a degreasing detergent to remove oil and dirt.
Wipe surfaces using 91% isopropyl alcohol to eliminate residual thermal grease and ensure no contaminants remain.
Tip: A clean surface improves thermal paste performance and ensures proper insulation from the mica washer.
2. Apply Thermal Paste to Mica Washers
Apply a small amount of thermal paste to both sides of the mica washer. Only a thin layer is needed-excess paste will reduce thermal conductivity.The ideal application leaves a slight bead of paste around the edges once assembled. This fills microscopic air gaps between surfaces; since air is a poor conductor of heat, thermal paste replaces these gaps to improve heat transfer. A thick layer is unnecessary, as thermal paste only needs to fill small voids.
3. Component Positioning & Alignment
Place the mica washer between the electronic component and the heat sink. Ensure the holes in the washer align perfectly with mounting holes on both the component and heat sink. Proper alignment is critical for both electrical insulation and heat transfer.
Recommended techniques:
Lapping: Smooth heat sink and component surfaces to avoid air pockets.
Deburring: Remove sharp edges to prevent damaging the mica washer.
Even clamping pressure: Apply uniform pressure to maintain contact for improved heat transfer.
Note: Mica washers provide insulation while transferring heat from the component to the heat sink.
4. Secure with Mounting Hardware
Insert mounting screws through the aligned holes. Install plastic insulating washers where screws contact the component or heat sink to avoid electrical shorts from metal-on-metal contact.Tighten screws using a torque-controlled electric screwdriver. Do not over-tighten, as excessive force may crack the mica washer or damage components. Secure firmly but gently.
5. Final Inspection
Before powering on the device, verify your installation:
Ensure the mica washer is free of cracks or pinching.
Confirm proper alignment of the component, mica washer, and heat sink.
Check that plastic insulating washers are correctly installed with no unintended direct metal contact.
Look for a thin, uniform line of thermal paste around the edges, indicating proper application volume.
Gently shake the assembly to confirm no parts are loose.
Tip: Correctly installed mica washers prevent short circuits and keep your equipment cool and safe.
Tips & Troubleshooting
Installation Best Practices
Always clean the mounting area before placing mica washers.
Precision-cut mica sheets avoid uneven insulation.
Use high-strength adhesive if needed to reduce washer movement and potential damage.
Minimize stacking layers to avoid excessive stress on mica.
Regularly monitor environmental humidity and temperature changes, which may affect washer condition.
| Best Practice | Description |
|---|---|
| Clean mounting area | Removes dust and grease for better adhesion |
| Precision-cut mica sheets | Prevents uneven insulation and damage |
| Use high-strength adhesive | Secures mica and prevents shifting |
| Avoid excessive stacking | Maintains uniform insulation and reduces stress |
| Monitor environmental conditions | Detects early damage from humidity or temperature changes |
Tip: Use the thinnest possible layer of thermal paste. Smooth, flat surfaces help prevent washer puncture.
Common Installation Mistakes
Misaligned washers
Excessive thermal paste
Cracked or damaged washers
Over-tightened screws
Missing plastic insulating washers
Dirty mounting surfaces
Troubleshooting
If sparking or short circuits occur, inspect the placement and condition of insulators. Ensure no metal parts are touching where contact should be avoided.A thin layer of thermal paste reduces thermal resistance. Smooth contact surfaces prevent damage. For less dependency on application quality, silicone pads can be used as an alternative.
Note: Properly installed mica washers keep your equipment safe and cool.
By following these steps carefully, you can safely install a heat sink using mica washers for insulation and thermal paste for improved heat transfer. This prevents overheating, maintains stable operation of electronic devices, and extends their service life. Careful installation protects your equipment and ensures reliable performance.
FAQ
How do I know my mica washer is installed correctly?
Check for uniform alignment, ensure no metal parts are in direct contact, and look for a thin, consistent bead of thermal paste around the edges.
Can mica washers be reused?
No. Old washers may crack or lose insulating properties. Always use new mica washers for each installation.
What happens if I skip plastic insulating washers?
You risk electric shock and short circuits. Plastic insulating washers prevent direct contact between metal components-always use them for safety.